While all my post production and media colleagues from around the world gather for NAB to discuss cool new storage hardware, and awesome backup and archive software (shout out to Archiware !!) I have been coding steadily at home working on my Media Trust Tools. Today I’m releasing v2.2. build 2 with many new features to help media professionals load up their camera cards and walk away, knowing they can Copy, Trust then Verify the results.
Coding Features and Building Products
What a fun learning experience it has been these last few months becoming a software developer and product manager.
My apps solve real world client problems, so keeping the features aligned with their workflow is the goal. You need to capture (ingest) camera footage on a lot of different camera cards after a film shoot, and you need to do a lot of it, and copy it everywhere safely and securely. That takes a special kind of software. Multi-source and multi-destination aware with ways of proving and certifying the copy afterwards. Show me the receipts!
While coding non stop with a little help from my AI friends I’ve been extending and expanding my existing apps and cli workflows into native macOS apps for my clients. Testing in production is crucial, proving that your code and apps work and make sense for end users. Along the way I’ve learned about creating shared code frameworks to optimise apps that share logic and features, creating tests in the code so original features don’t regress when new features are added, and a lot about Swift and Xcode and AI helper tools (Anthropic Claude is the best, while OpenAI’s Codex is not far behind).
Coding Tools Are Overconfident
In 5 months of Swift coding and building and testing Mac apps to do media copy things, it can be struggle to remain focussed on the specific features your clients need while accommodating various workflows. I found the trick is to iterate a lot, making small changes, only adding one or two features at a time, using git feature branches to test, using local git repos and remote GitHub main repos. And for sanity, lots of features and goals and next steps documentation to keep some ideas for tomorrow while I focus on today’s testing goals. Using Claude and Codex to tech audit each other helps, and review documentation vs actual code.
“The bug fixes you declared fixed were over confident in their declarations” said one AI tool of the fixes it documented to patch the bugs it created.
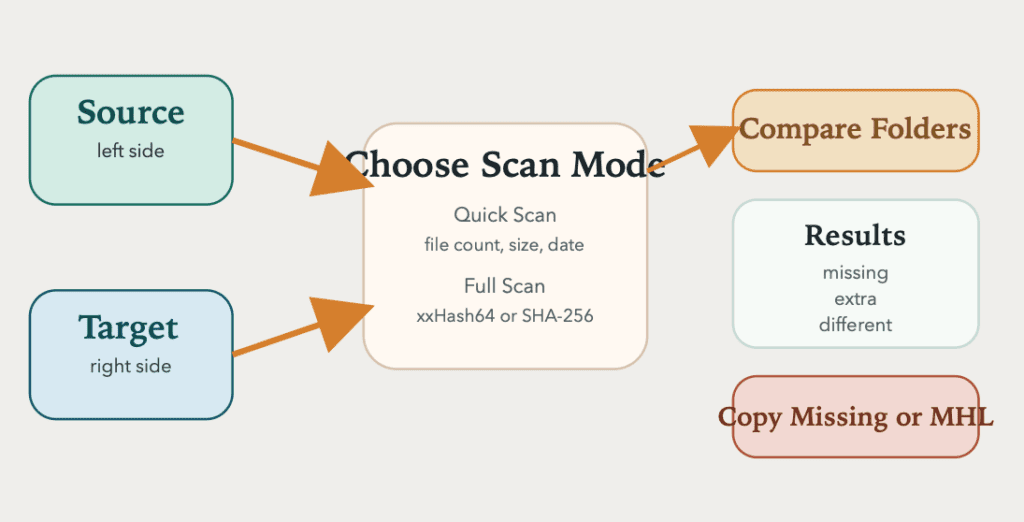
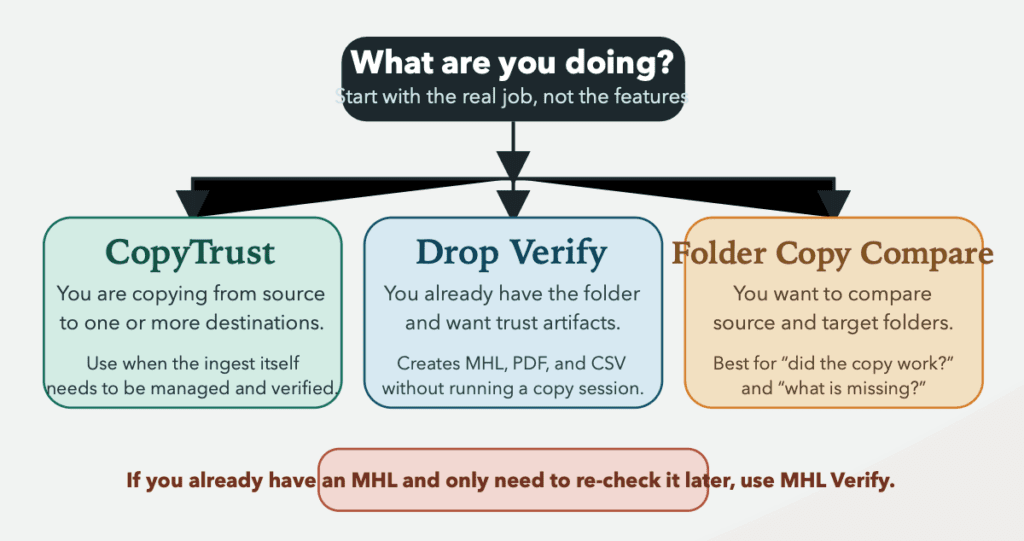
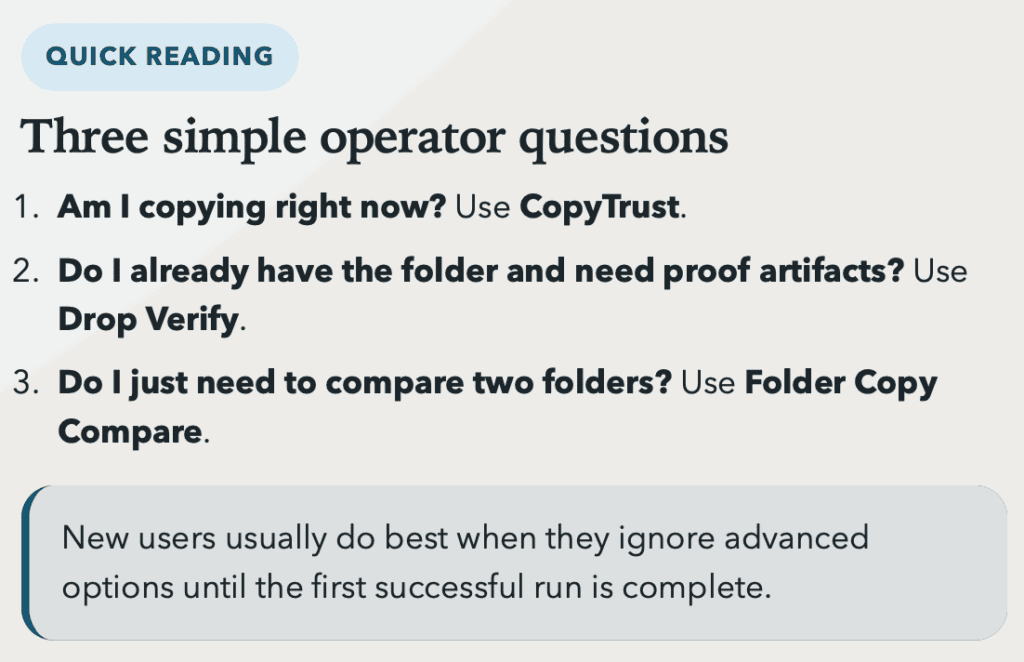
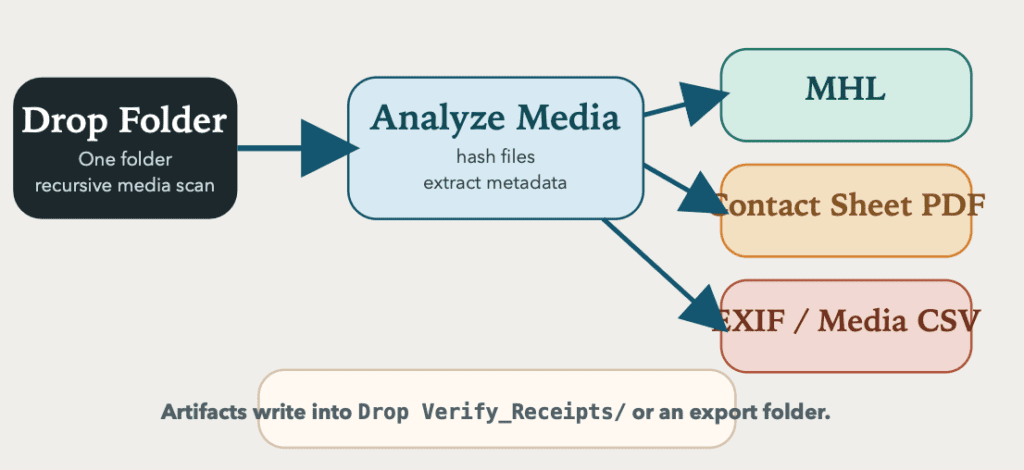
Adding to my apps to help manage Archiware P5 archives, I now have tools for camera card ingest workflows (CopyTrust) and MHL (media hash list) verification (MHL Verify, Drop Verify) and simpler sanity checks for copies made with other apps (Folder Copy Compare).
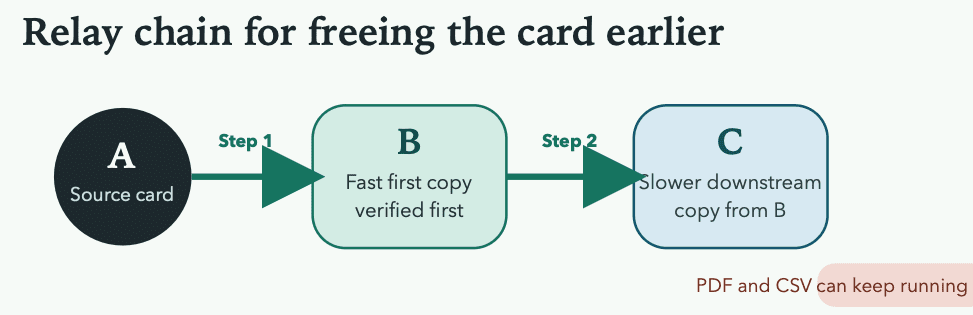
I’ll keep adding features when requested by my end users and keep testing in production. Right now with v.2.2 build 2 just released I can test the new relay chain feature which allows users to copy to the first and fastest storage then copy verified copies onwards to additional storage. With sending to Archiware P5 archives on LTO automatically in the future. Keep that planning list up to date of features to be considered once testing is happy these current features work properly. One thing at a time.
See the Archiware P5 apps and Final Cut Pro helper apps at code.matx.ca and more details for the Media Trust Tools specifically in GitHub.


